Create a Beautiful New Mosaic Top to Give That Old Table New Life
Posted by Cathleen V. on 13th Jun 2023

My husband had a hand-me-down birch table that had been passed through several members of the family before it became his. Through some of its misadventures in life, it had become pretty beaten up by the time we settled down on our farm. Though it's probably beyond salvaging for refinishing, it will make a great substrate for a beautiful mosaic tile patio table. Here's how you can do the same thing to DIY a handy table for your home.
SUITABLE MATERIALS
When you're selecting a table for this home improvement project, you'll want to try to find one that doesn't have MDF, also known as fiberboard, as it can be difficult, if not impossible, to tile without extensive preparation. It also may not have the structural strength to bear the extra weight of the tiles, mortar and grout.
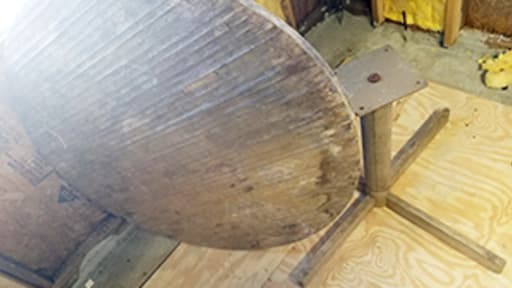
Here's the original table:
Tiles and found objects can come from a wide range of locations, whether from the store, leftover from another project or simply discovered during life's adventures. Small rocks, bits of glass, shells, ceramic pieces and similar items are ideal to integrate into your new tabletop, but be aware that you'll want them to be similar in depth. The table that was tiled for this home improvement project had approximately 1/16" difference between some of the materials, which was still somewhat noticeable in the finished tabletop, but okay. I'll have some tips on how to handle items that you want to incorporate that are significantly thinner or thicker than the other tiles or items you incorporate into your tabletop.
Because I was creating a tabletop in a single weekend, I used a fast-setting mortar to attach the tiles to the table's surface. However, because of how quickly it would set up during layout, I prepared multiple small batches, typically mixed with enough water to reach a thick milkshake consistency. I used a sanded grout that was able to deal with the wide range of spaces that occur in a free-form tile mosaic. Because the table will be used outside, I choose to seal it to ensure it would remain in the best possible condition for years to come. I also used 1/8" and 3/16" spacers, a utility knife, a pencil, a carpenter's square, a 3/16" v-notched trowel, a putty knife, a larger trowel for grouting, a grouting sponge and a few pairs of neoprene gloves.
PREPARATION
If the table you're going to use for this DIY project had laminate on the surface that has curled or warped at the edges, you'll want to sand it down fairly heavily. If it's pulling loose, a little wood glue and a weight on top will help keep it in place. Pro tip: If you're trying to get glue into a small area, a syringe and 12-gauge needle from a farm store works wonderfully to inject the glue where you need it to go. I keep one with the point filed to prevent accidental sticks in my workshop for issues like this.
A palm sander and coarse sandpaper make sanding down the surface go much more quickly. You don't need to have a perfect glossy surface - in fact, you want some amount of texture for the mortar to stick to. If there are other parts of the table that are unstable or need reinforcement, this is the time to make that happen, including re-gluing any joints that have come apart.
Once you're done, clean the surface well using compressed air, a tacky cloth or similar implement. If you're concerned about the impact the mortar may have on the underlying structure, you may want to seal the surface in some fashion, using paint or primer, specifically an acrylic or SBR primer.
LAYOUT
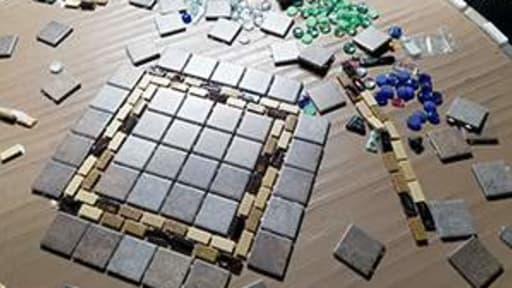
Once your table is ready to tile, it's time to start laying out your design. Tiles that are already attached to a mesh backing can make this part of the process go much more easily.
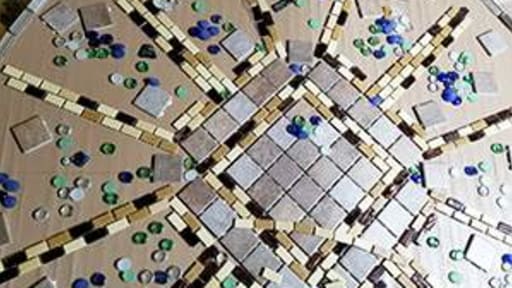
One option that makes the process easier in the long run is by "slicing the pie" and working in specific areas at a time. In the project piece, I placed a square of tiles that were built out from the middle, then divided the remaining sections into twelve freeform areas. I used a carpenter's pencil and square to mark these sections on the table for the mortaring process.
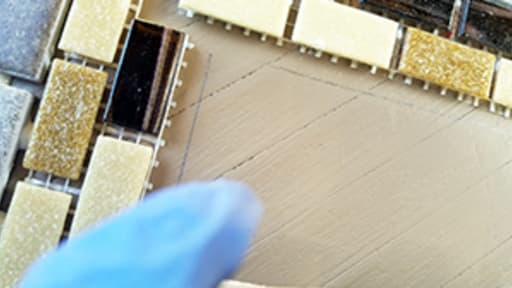
Once you've decided on the basics of your layout, you'll be able to decide what to do with materials that are thinner or thicker than the rest of the tile you're using. If the pieces are thinner, you can choose to either build up a layer of mortar where those pieces will go, then add a second layer of mortar to set them in, making up the difference. If they are thicker, you can choose to rout out a bit of the table's surface where those pieces will go, either with power tools or a wood rasp or carving knife to pull out the excess material. If you decide to go this route, make sure you seal the surface with primer before you begin mortaring the tiles. Another option is to use a tile membrane, hardibacker or similar thin material to build up the rest of the surface except for the areas where the thicker materials will be used.
SETTING THE TILES
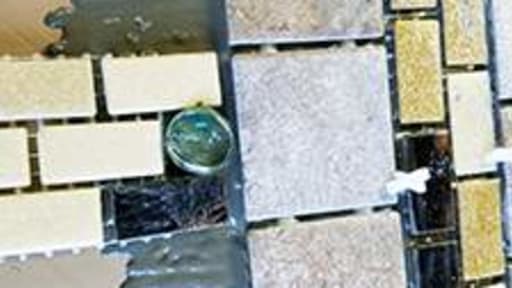
Now it's time to start putting the tiles in place. Following the directions on your mortar mix, mix up the mortar in batches that you can lay down and set before it begins to set on you. For the tabletop I created, I went through four small batches, about four cups each. If you're using tiles smaller than 4", you'll want to use a 3/16" v-notch trowel to spread your mortar, as in the picture below. I chose to wear neoprene gloves while handling the mortar and grout, as these compounds can be very hard on the hands.
Once you've spread enough mortar for the area you're tiling at the moment, it's time to start setting tiles. If you're using clear glass tiles, pebbles or found objects, you may want to butter the back of the piece with the mortar to ensure the grooves from the trowel don't show through.
Place the tiles in place, wiggling them slightly to embed them in the mortar. Once you've finished placing the tiles in a particular area, lay a small board over that section, then tap gently with a mallet to set them and align them in the bed of mortar. Keep repeating this process until all the tiles are set.
If you're planning on using tiles on the edges of your DIY tabletop, you'll want to mix your mortar slightly thicker, and may need to go back and forth a few times before the tiles will stay in place. Another option is to add a support underneath the bottom of the tiles, or to apply them a few at a time with the table on its side.
GROUT
Depending on the type of mortar you use, you'll need to wait a particular amount of time before grouting the tiles. With the quick-setting mortar I used in the example piece, this was about 2-3 hours, which is helpful if you want to complete the project quickly. Grout is mixed to a firmer consistency than mortar, closer to that of peanut butter.
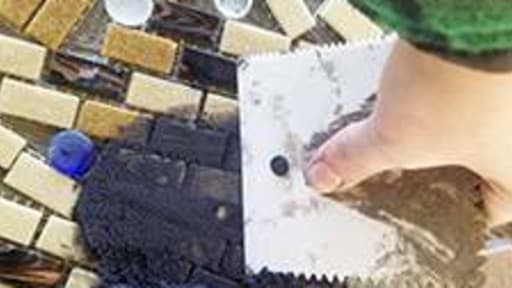
Start by spreading the grout into the joints by holding the trowel at a 45º angle from the work surface to pack the grout into the joints. Once that's done, you'll want to go over the tiles again, with the trowel at a 90º angle from the work surface to scrape off any excess grout. If you have slightly different material thicknesses in your piece, you may want to use a putty knife or even your gloved hands to remove the excess. The grouting process was cat tested, as our flame-point Siamese Loki decided to jump up on the table, displacing the grout, but it just took patting it back into place to fix the scratches he caused. He decided after a couple treats that he'd leave the DIY work to the humans.
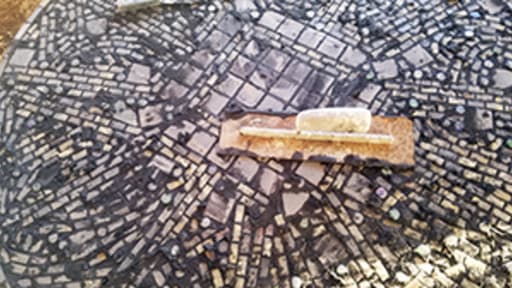
To grout the edges, you can apply additional grout either with a trowel, or by using your gloved hands. The reason I like to use my hands is because I can get a good feel for where the material is thin and where it's too thick, allowing me to shape it carefully with my fingers as I go and make small repairs where it's needed.
CLEANING, SEALING AND PAINTING
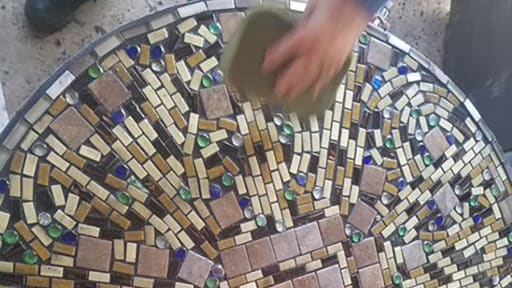
Once the grout has set for the time listed on your grout package - mine was 10-20 minutes - you'll want to start wiping down the grout to reveal the tile surfaces. If you used a strong contrast, such as the deep gray I used in the example piece, plan on doing this several times until the tile surfaces are showing clearly. You'll want to have a bucket of water handy and a grout sponge. Wet the sponge and then squeeze most of the water out, then use it to gently remove the excess grout, including that which is covering the tiles.
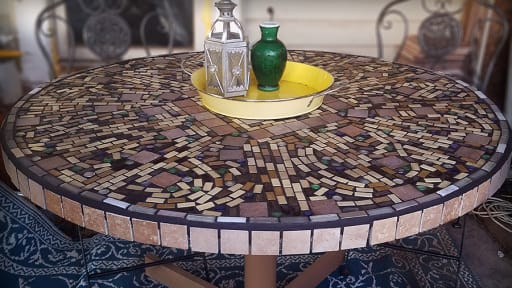
Once the tiles are clean, let the grout sit for the time listed on the package, typically 24-48 hours. During this time, you can start painting any remaining parts of the table that need it. I waited until this point so that if any of the grout or mortar fell on the legs of the table during the tiling process, I didn't have to worry about it staining or sticking to fresh paint. For this project, I used an exterior-grade primer-and-paint combination latex paint in a satin sheen. This allows me to clean the legs and feet of the table while still holding up to UV light and the weather. After the required time has passed for the grout to cure, you can use a sealer on it to help make it withstand the elements and everyday life a bit better.
CONCLUSION
I had a great time working on this home improvement project table. The prep work took about 10 minutes for the glue and 20 minutes for the sanding. The free-form layout that I used was probably the most time-consuming that I could use, and it was still laid out and mortared down in about 6 hours. Adding the edge tiles took about a half hour, with a bit of help from my husband. Grouting took another hour, with cleanup, sealing and painting taking an additional hour and a half. With a total of 9.5 hours for a relatively difficult layout, this DIY project is easily completed over a weekend while providing you with a unique piece of art that will provide years of reliable service.
ABOUT THE AUTHOR

Cathleen V. is a dedicated DIYer, writer and artist living with her family on their sheep farm in southwest Missouri. With over 26 years of experience in contracting and advanced DIY, she loves helping people find their inner artist and style. She's also an active member of the local arts scene creating beautiful glass and fiber artwork, and also volunteers in a range of emergency response roles in the community.
The articles and other content contained on this website/blog are provided for informational purposes only and should not be relied upon for any purposes. While it is our goal to provide you with up-to-date, relevant and useful information on a wide range of topics, we make no representations or warranties of any kind, whether express or implied, concerning the reliability, suitability, completeness or accuracy of any of the information made available on this site. The articles and information contained on this site are not intended to provide legal, accounting or other professional or business advice and should not be treated as a substitute for the advice of a professional with knowledge of the facts and circumstances of your specific situation. By accessing this site, you agree that you will not seek to hold E.C. Barton & Company or any of its affiliates liable for any losses or unanticipated costs or assert any other claim based on your use of this site or on the reliance on the content contained herein.

